

What you will do
In this walkthrough you will create an annotation label, set up a queue, add traces to it, and annotate your first item. The entire flow takes about 5 minutes.1
Create an annotation label
Navigate to Annotations in the left sidebar, then open the Labels tab. Click Create Label.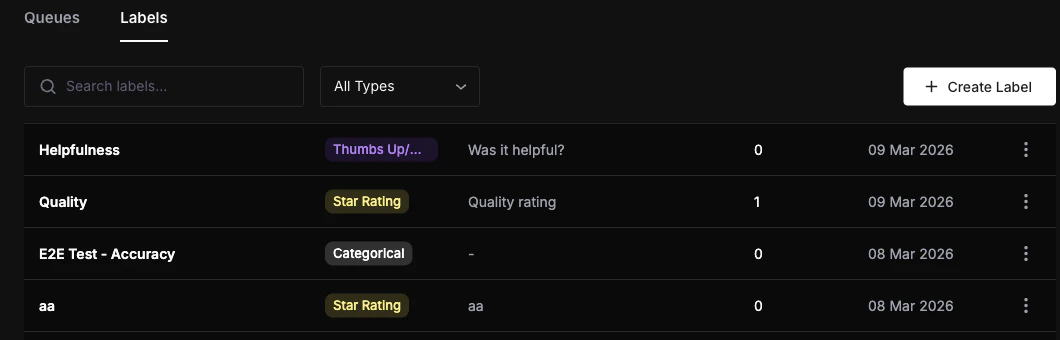
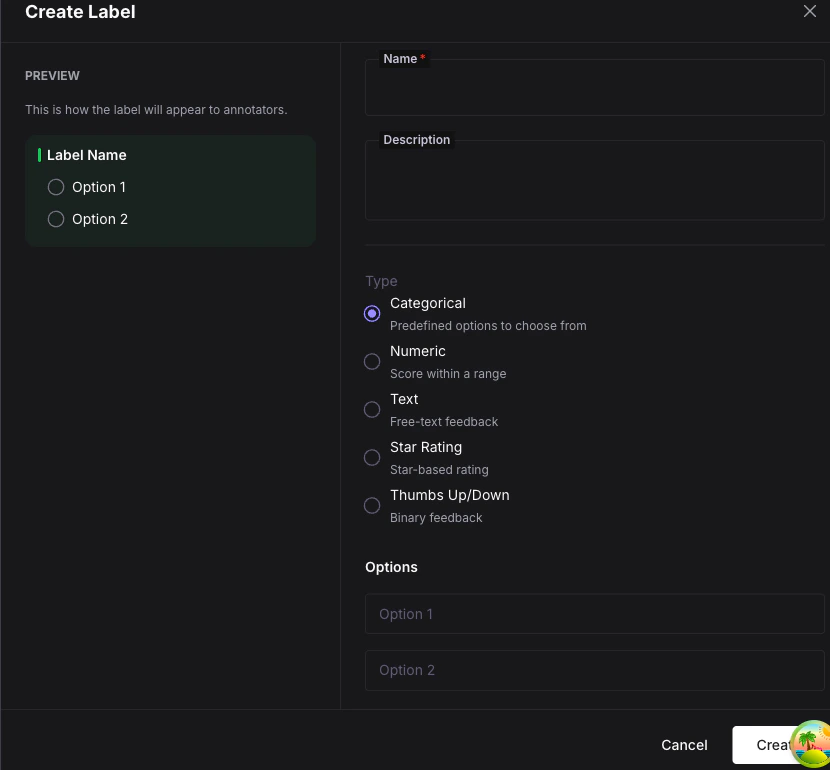
Click Create to save.
2
Create a queue
Switch to the Queues tab and click Create Queue.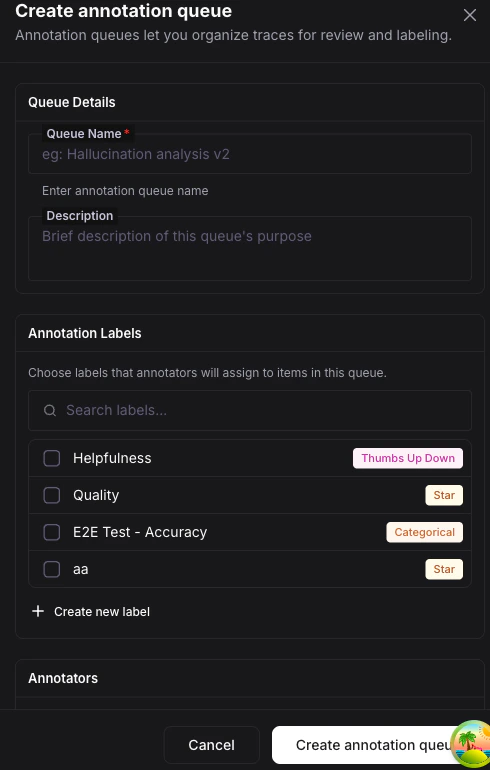
Click Create to save the queue.
3
Add items to the queue
Go to your Observe project and open the LLM Tracing view. Select one or more traces using the checkboxes, then click the Add to Queue button in the toolbar.In the dialog, choose Review Queue and confirm. The selected traces are now queue items with a Pending status.
4
Start annotating
Go back to Annotations > Queues and click on Review Queue to open its detail page. Click Start Annotating.The annotation workspace loads the first pending item. You will see: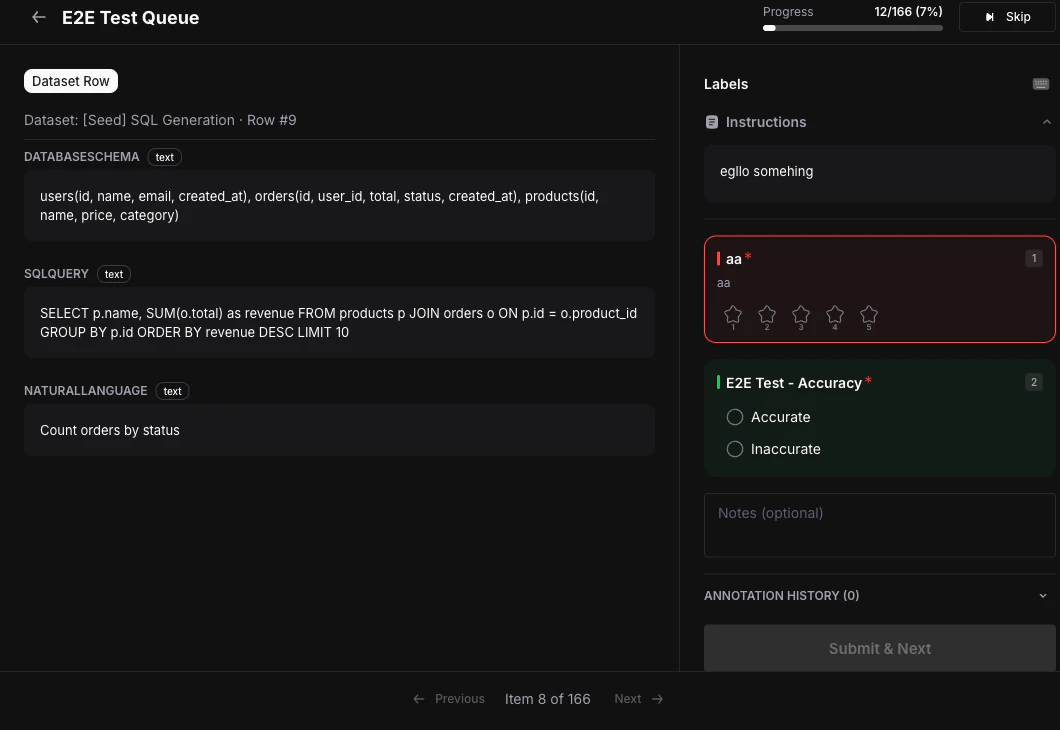
- The trace content on the left.
- The annotation panel on the right with your
Sentimentlabel.
5
Review progress
Click the Analytics tab on the queue detail page to see completion rates, annotator activity, and label distribution.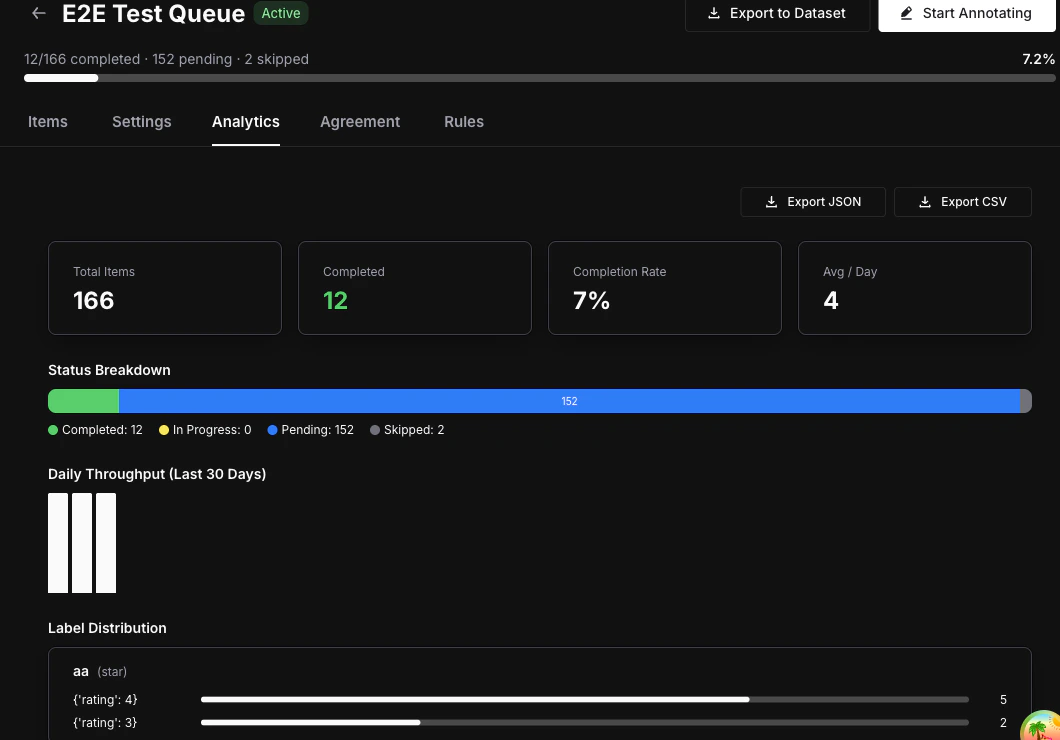
What you can do next
Annotation Labels
Explore all five label types and their configuration options.
Queues & Workflow
Configure assignment strategies, multi-annotator requirements, and review workflows.
Scores
Understand how annotation data is stored and queried via the Score model.