

What it is
An annotation label is a reusable template that defines what feedback annotators provide. Labels are organization-scoped — once created, any queue in your workspace can use them. This keeps annotation criteria consistent across teams and projects.Label types
FutureAGI supports five label types. Each type determines the UI control annotators see and the value format stored in the resulting score.Allow Notes
Every label type supports an optional Allow Notes toggle. When enabled, annotators can attach free-text notes alongside their primary annotation. This is useful for capturing context that a structured label cannot express — for example, explaining why a response was rated as Negative. Notes are stored in thenotes field of the resulting score and are available in exports and the API.
Scope and reuse
Labels belong to the organization, not to individual queues or projects. This means:- A label created by one team member is available to all queues in the workspace.
- Updating a label’s name or description applies everywhere it is referenced.
- Deleting a label does not remove existing scores that were created with it — historical data is preserved.
Which type should I use?
Use the decision guide below to pick the right label type for your scenario.Creating a label
1
Open the Labels tab
Navigate to Annotations in the left sidebar and select the Labels tab. Click Create Label.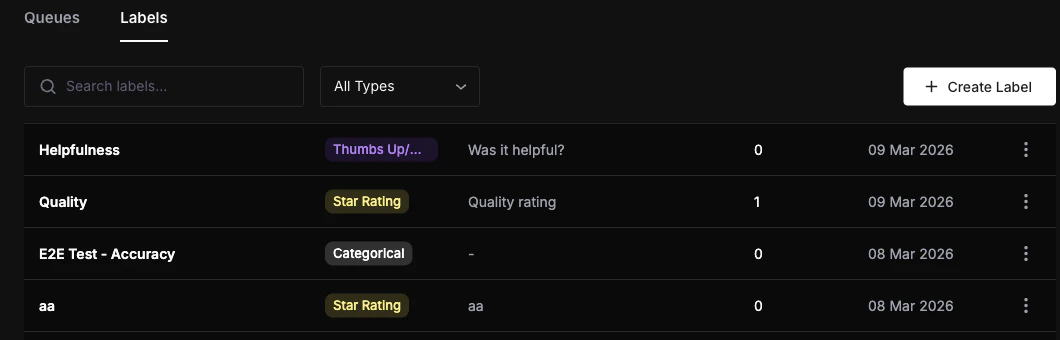
2
Configure the label
Fill in the label name, select a type, and configure the type-specific settings described in the table above. Toggle Allow Notes if you want annotators to provide written context.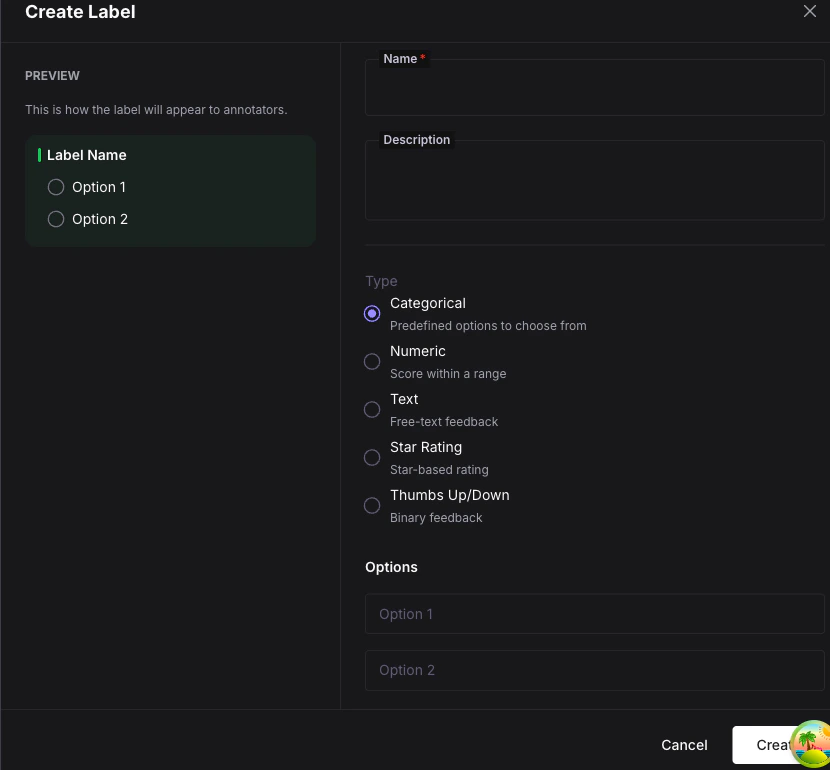
3
Save
Click Create. The label is now available for any queue in your organization.
UI appearance by type
Each label type renders a different control in the annotation workspace:What you can do next
Queues & Workflow
Attach labels to a queue and configure how annotation work is distributed.
Scores
See how label values are stored as scores and queried via the API.